How to Set Up a MediaWiki 1.23 Server on CentOS 6
From steamWiki
This how to covers installing MediaWiki 1.23.1 on a CentOS6 server.
- Installing MediaWiki
- Install Apache
- run sudo yum install httpd to install apache and its dependencies
- run sudo chkconfig httpd on to make sure apache starts on boot
- Add the following lines to your /etc/sysconfig/iptables file to allow web traffic
- # Accept web traffic.
- -A RH-Firewall-1-INPUT -m state --state NEW -m tcp -p tcp --dport 80 -j ACCEPT
- restart to ensure the iptables are reloaded and check that apache is correctly started at boot
- Visit the ip address of your server, preferably from a different computer, to ensure everything is working properly. You should see something like this.
- Install MySQL
- run sudo yum install mysql-server to install the mysql server and its dependencies
- run sudo chkconfig mysqld on to make sure that mysql starts on boot
- run sudo service mysqld start to start the mysql server
- run sudo mysql_secure_installation
- just hit enter for 'none' at the 1st password prompt
- hit y and enter to set a root password
- type in your new root-password and hit enter (twice)
- hit y and enter to remove the anonymous account
- hit y and enter to ensure that root can only login at the physical keyboard
- hit y and enter to remove the test database
- hit y and enter to reload the privilege table
- run mysql -u root -p to log into MySQL monitor
- run CREATE USER 'wiki'@'localhost' IDENTIFIED BY '<Your_Secure_Password>'; to create the wiki user
- run CREATE DATABASE wikidb; to create the wiki database
- run GRANT ALL PRIVILEGES ON wikidb.* TO 'wiki'@'localhost' IDENTIFIED BY '<Your_Secure_Password>' WITH GRANT OPTION; to give the wiki user correct access to wikidb
- Install PHP
- run sudo yum install php php-mysql php-gd php-xml to install required php components dependencies
- run sudo vi /var/www/html/info.php to create and edit a new webpage & populate the file with the following:
- <?php
- phpinfo();
- ?>
- save & exit
- run sudo service httpd restart to reload the apache server
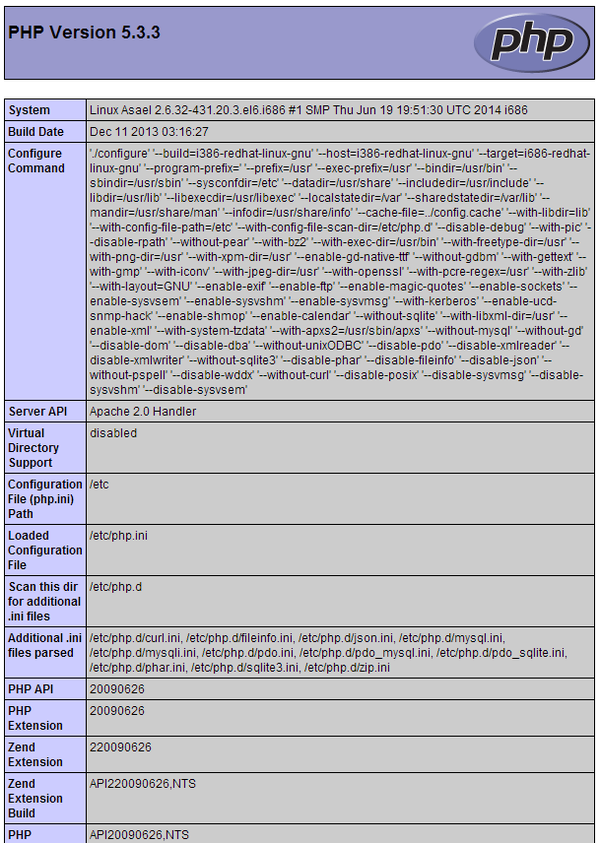
- visit your server ip/info.php (ie: http://192.168.1.100/info.php) and it should look something like this:
- Install Mediawiki
- If you don't already have it, install wget via sudo yum install wget
- Visit the MediaWiki Download page to find the latest version. Substitute the path to the latest version in the next command if necessary
- run cd ~ to navigate to your home directory
- run wget https://releases.wikimedia.org/mediawiki/1.23/mediawiki-1.23.1.tar.gz to download the latest version of MediaWiki
- run tar xvzf mediawiki-1.23.1.tar.gz to unpack the downloaded file
- run sudo mv ~/mediawiki-1.23.1 /etc/mediawiki to move the mediawiki directory to a non-version specific general location
- run sudo ln -s /etc/mediawiki/ /var/www/ to create a symbolic link from Apache's document root to the MediaWiki directory
- run sudo chown -h apache:apache /var/www/mediawiki to ensure that the symbolic link is owned by the apache user
- run sudo chown -R apache:apache /var/www/mediawiki/ to make the apache user the owner of all of the mediawiki files so that can properly serve the documents
- Configure SELinux to allow the change in apache's DocumentRoot
- run sudo yum install policycoreutils-python to allow you to run setsebool (this can take several minutes)
- run setsebool -P httpd_enable_homedirs on to allow apache to use a non-standard DocumentRoot (this can take several minutes)
- Backup and modify /etc/httpd/conf/httpd.conf
- change DocumentRoot "/var/www/html" to DocumentRoot "/var/www/mediawiki"
- change <Directory "/var/www/html"> to <Directory "/var/www/mediawiki">
- change DirectoryIndex index.html index.html.var to DirectoryIndex index.html index.html.var index.php
- run sudo service httpd restart to restart apache using the new configuration
- at this point you should be able to visit your server again and see something like this
- click the set up the wiki link and follow the instructions. My server was configured as below:
- Language
- Your language: en - English
- Wiki language: en - English
- Existing wiki
- Welcome to MediaWiki
- Connect to database
- Database type: MySQL
- Database host: localhost
- Database name: wikidb
- Database table prefix:
- Database username: wiki
- Database password: Your_Secure_Password
- Database settings
- Use the same account as for installation: yes
- Storage engine: InnoDB
- Database character set: UTF-8 (I went with UTF-8 since my wiki will only really use English)
- Name
- Name of wiki: steamwiki
- Project namespace: Same as the wiki name: Steamwiki
- Your username: sean
- Password: Super_Secret_Password
- Password again: Super_Secret_Password
- Email address: sean@gmail.com
- Subscribe to the release announcements mailing list: no
- Ask me more questions: yes
- Options
- User rights profile: Authorized editors only (I chose this because my wiki is a place for me to post articles. You may want a more relaxed wiki for your project)
- Copyright and license: Creative Commons Attribution Share Alike (you may want to review the options for your own wiki)
- Enable outbound email: no (I don't need email for my wiki)
- Extensions: PdfHandler, WikiEditor (You may want other extensions)
- Enable file uploads: yes
- Directory for deleted files: /etc/mediawiki/images/deleted
- Logo URL: $wgStylePath/common/images/wiki.png (you can change this later in LocalSettings.php)
- Settings for object caching: No caching (no functionality is removed, but speed may be impacted on larger wiki sites)
- Install
- Language
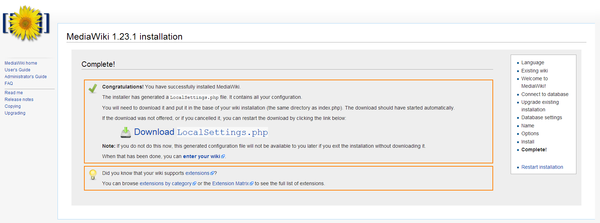
- After the install is complete you should see a screen like the one below and be able to download the LocalSettings.php file you just downloaded.
- Move LocalSettings.php into /etc/mediawiki on your server
- Be sure to run sudo chown apache:apache LocalSettings.php so that the web server can access the file
- Install Apache


